Go Network Overview
Go Network is BitGo’s settlement infrastructure built within regulated qualified custody enabling secure transfers of fiat and digital assets.
Go Network was built to close industry gaps and provide a platform for settlement, minimizing risk, friction and delays. By keeping assets in regulated custody until settlement instructions have been confirmed, Go Network ensures that counterparties cannot access your assets prematurely, creating a safer environment for all participants.
Regulated infrastructure: all assets remain within BitGo’s cold qualified custody, segregated and bankruptcy-remote
Insurance: BitGo’s $250M insurance coverage protects against theft, loss or misuse of keys
Offchain: all transactions conducted via Go Network occur offchain, improving efficiency, privacy and operational control
Battle-tested technology: years of real-world use and proven to support secure, high-volume transactions while maintaining uptime and resilience
Asset support: Go Network supports the ability to transfer and settle thousands of digital assets
Control and visibility: retain full control over your assets with the ability to integrate BitGo’s operational safeguards, such as policies, to provide additional layers of security.
Network: trusted network of the industry’s leading institutions
To begin utilizing Go Network you will need to have assets in your Go Account. Deposit crypto or fiat to get started.
Note: contact your Customer Success Manager or support@bitgo.com to enable your enterprise for Go Network.
Settle
Go Network enables the settlement (payment) of fiat and digital assets between Go Network clients. To locate, go to the left side bar navigation Liquidity > Go Network.
You may perform:
Unilateral transfers:
You initiate a BTC transfer to a counterparty
The transfer is completed as soon as you sign the transaction and does not require approval from your counterparty
Bilateral settlements:
You initiate a BTC transfer to a counterparty and request USD in return
Once signed by you and approved by your counterparty, BTC and USD are transferred simultaneously
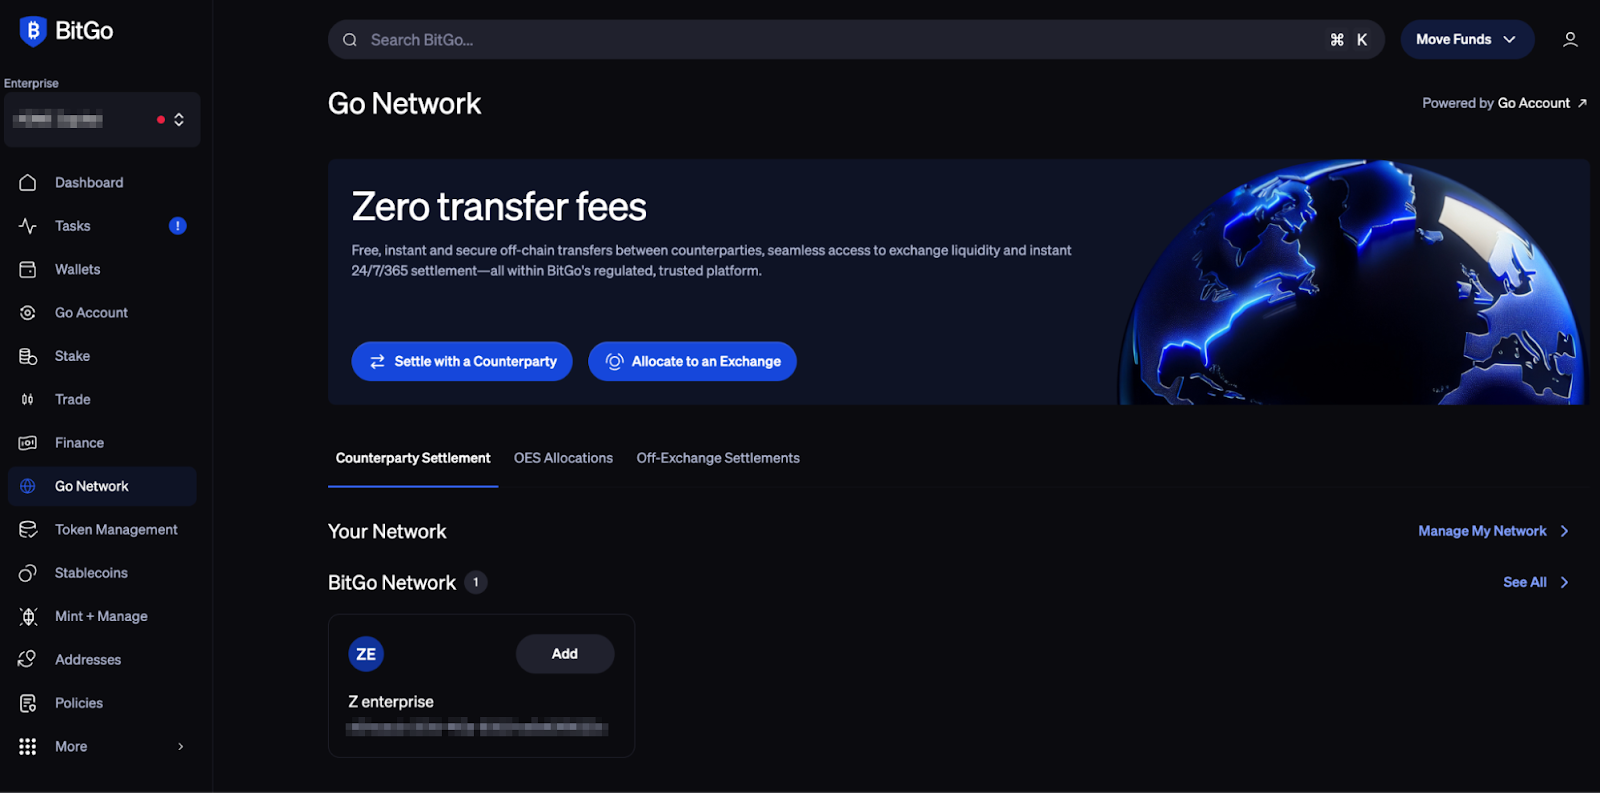
Add a Counterparty For Settlement
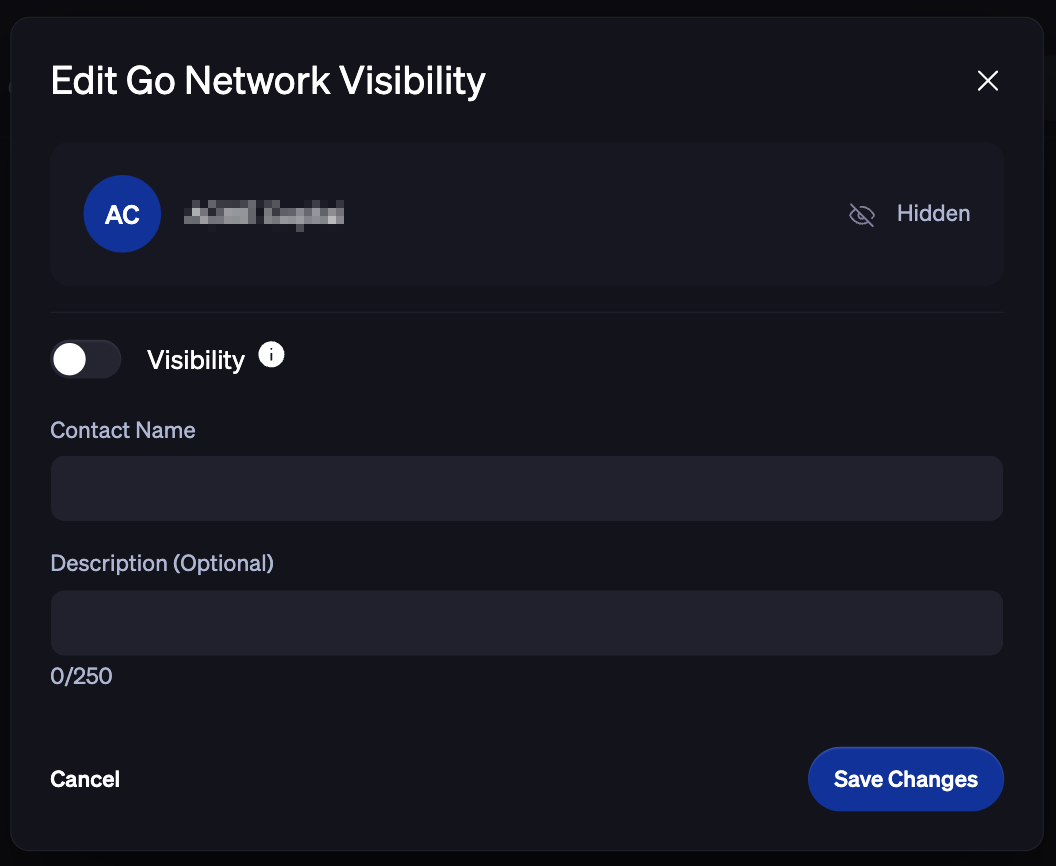
Publicly list your Enterprise in the Directory
To be publicly listed on the directory, navigate to the Go Network page. Click Manage My Network or See All and in the upper right hand corner you will be able to view your Go Network Visibility.
Click into it and toggle Visibility to go from Hidden to publicly listed. You can then add in a visible description for your Go Account that will help other users find you in the directory.

Add a Counterparty from the Directory
View all publicly listed Go Accounts in the Directory by navigating to Go Network > Manage Manage My Network or Go Network > See All > Discover. All counterparties will have their Enterprise name of the Account listed and an optional description added by the Enterprise.
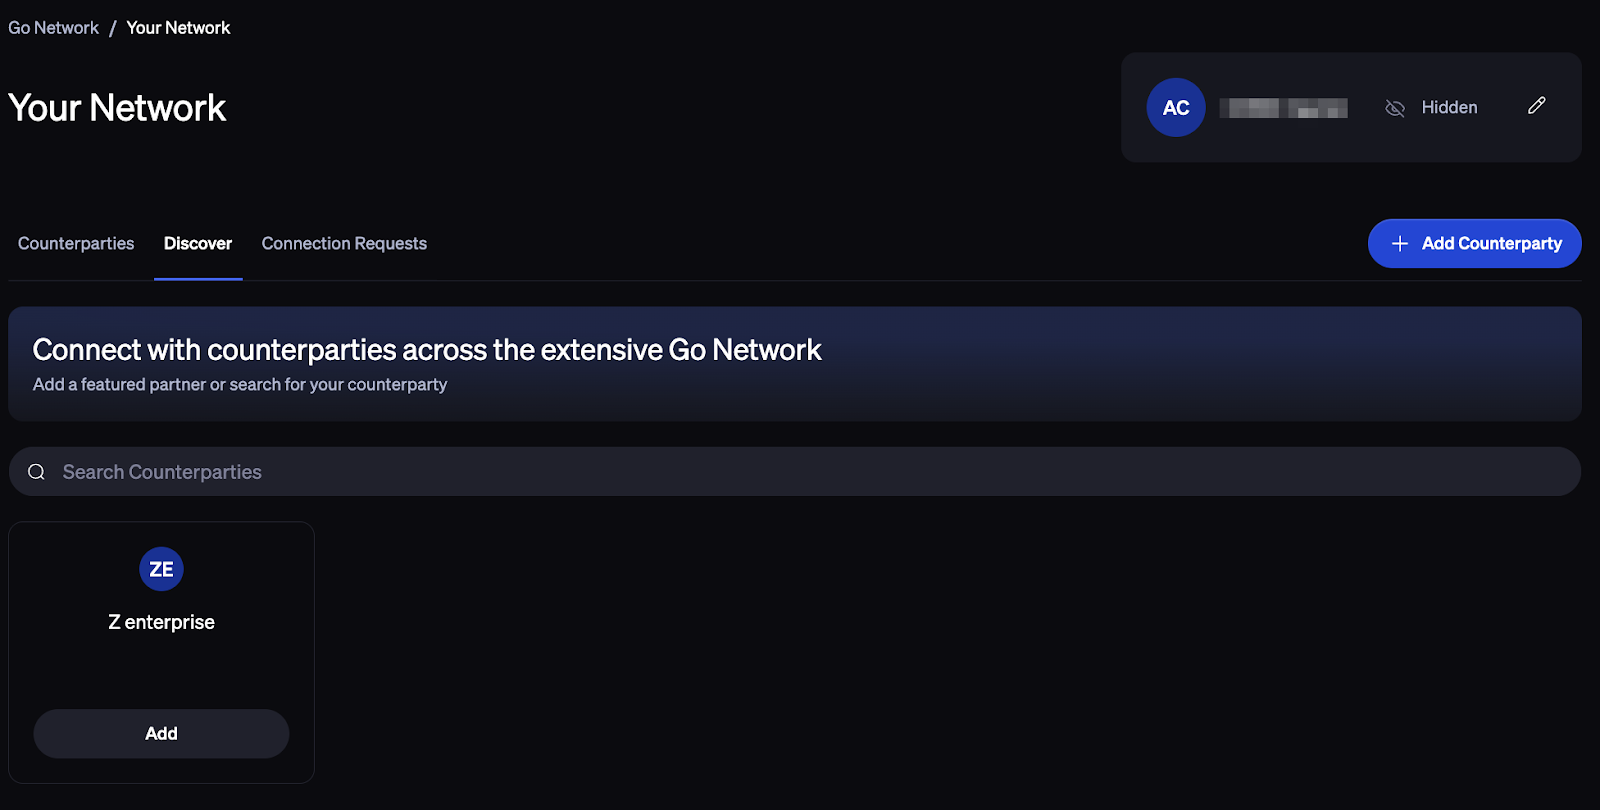
Added Counterparties will be displayed at the top of the Counterparties tab. You can now settle with these counterparties, by simply clicking Settle.
Add a Counterparty Manually
To add a counterparty not publicly listed, you can select the + Add Counterparty button and specify the Counterparties Go Account Wallet ID (found on their Go Account settings page).
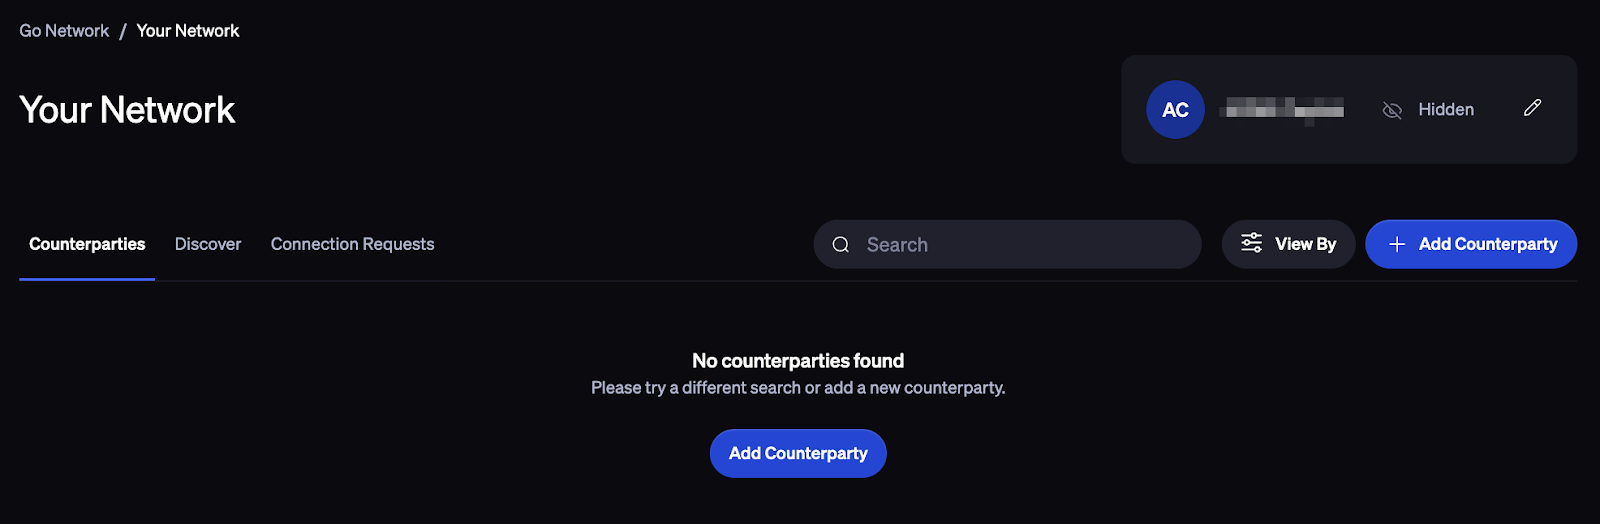
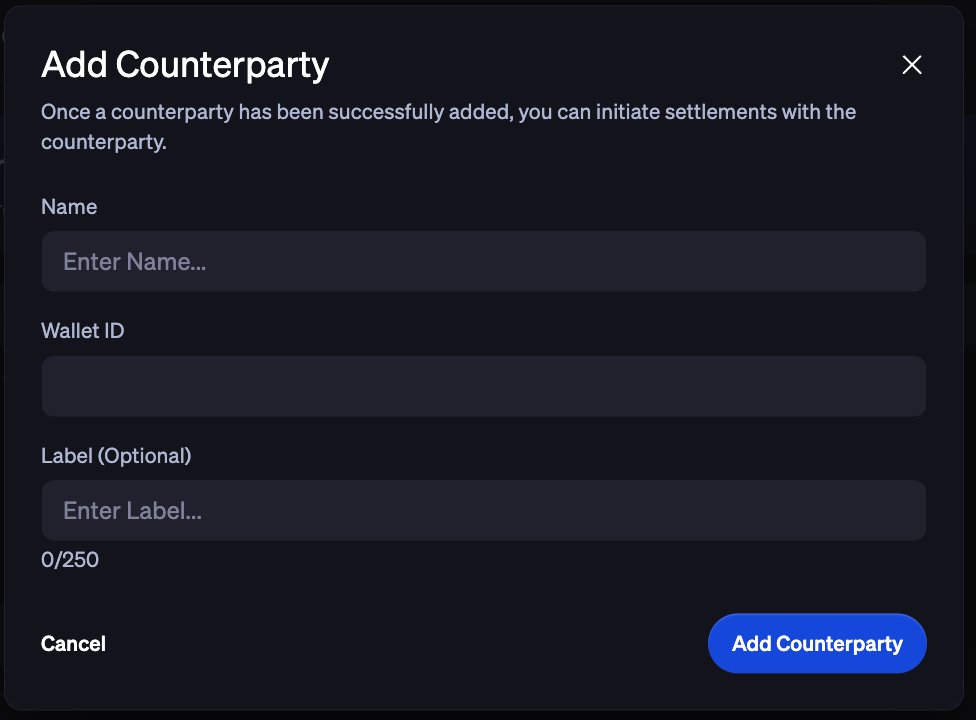
The counterparty will now be reflected in your Counterparties tab and available in the Settlement initiation form when you look to initiate a settlement.
View Connection Requests
In Your Network Dashboard, go to Connection Requests to view any requests you may have received to be added to another account’s settlement network.
Initiate a Settlement
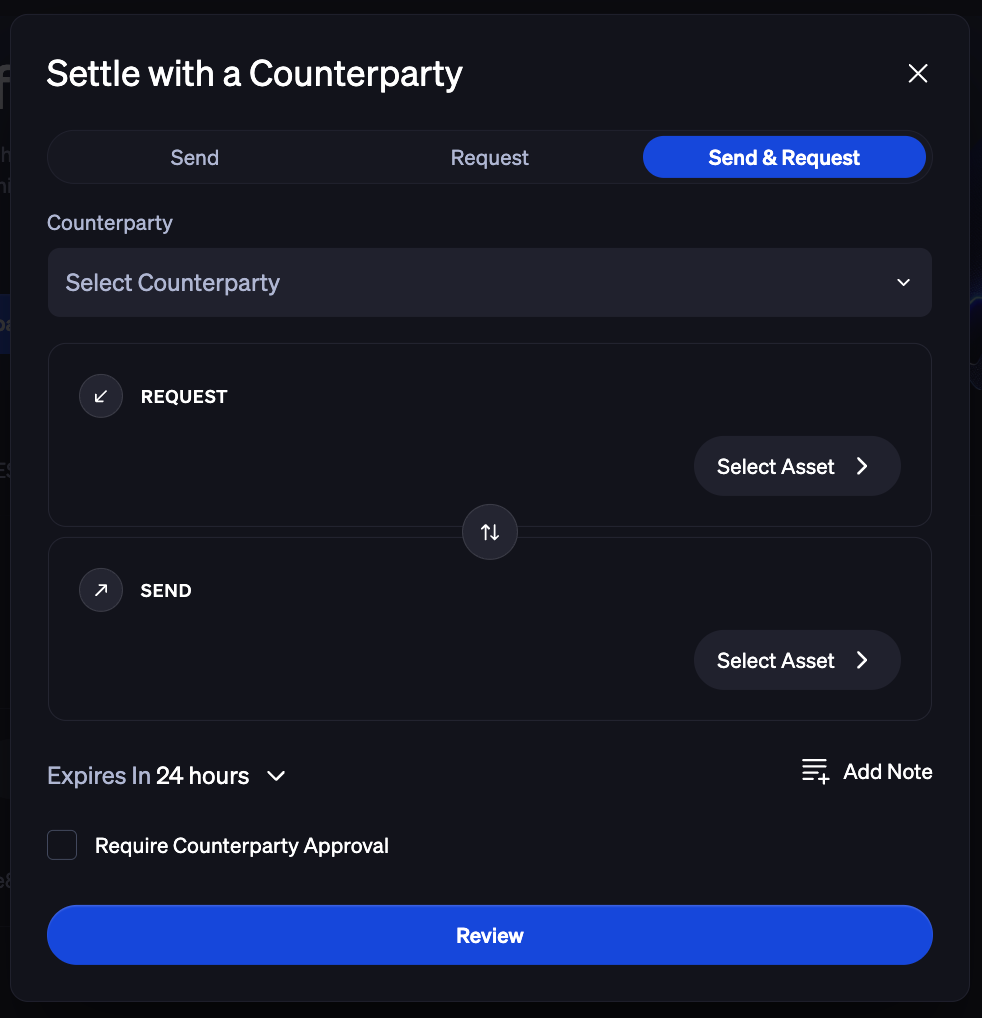
Settlements are initiated from the Go Network > Settle with a Counterparty tab in the platform. You may select:
Send & Request: bilateral settlements, allows you to indicate assets you will be sending to your counterparty and the assets you will receive from your counterparty
Send: unilateral settlement, allows you to indicate assets to send to your counterparty
Request: unilateral settlement, allows you to indicate assets you wish to receive from your counterparty
BitGo supports settlement of multiple assets at once. Simply select the assets and amounts you will be sending and the assets and amounts you will be receiving. You may also set an expiration for this request.
Click Review then Confirm Settlement to send the request to your counterparty. Once submitted, your funds will be locked and the request will be sent to your counterparty.
Pending Settlements
Pending settlements will appear in your Tasks page as well as directly in the Go Network tab under Transactions.
If you have received a request, you can view the details of your pending settlement and approve or cancel it. Once you’ve approved, assets from you and your counterparty will be transferred.
If you have initiated a request, you can view the details of your pending settlement as well as rescind the request up until your counterparty accepts. Once you’ve approved, assets from you and your counterparty will be transferred.
Settlement Policies
You can add settlement policies within the Securities > Policies section in the left side navigation bar.
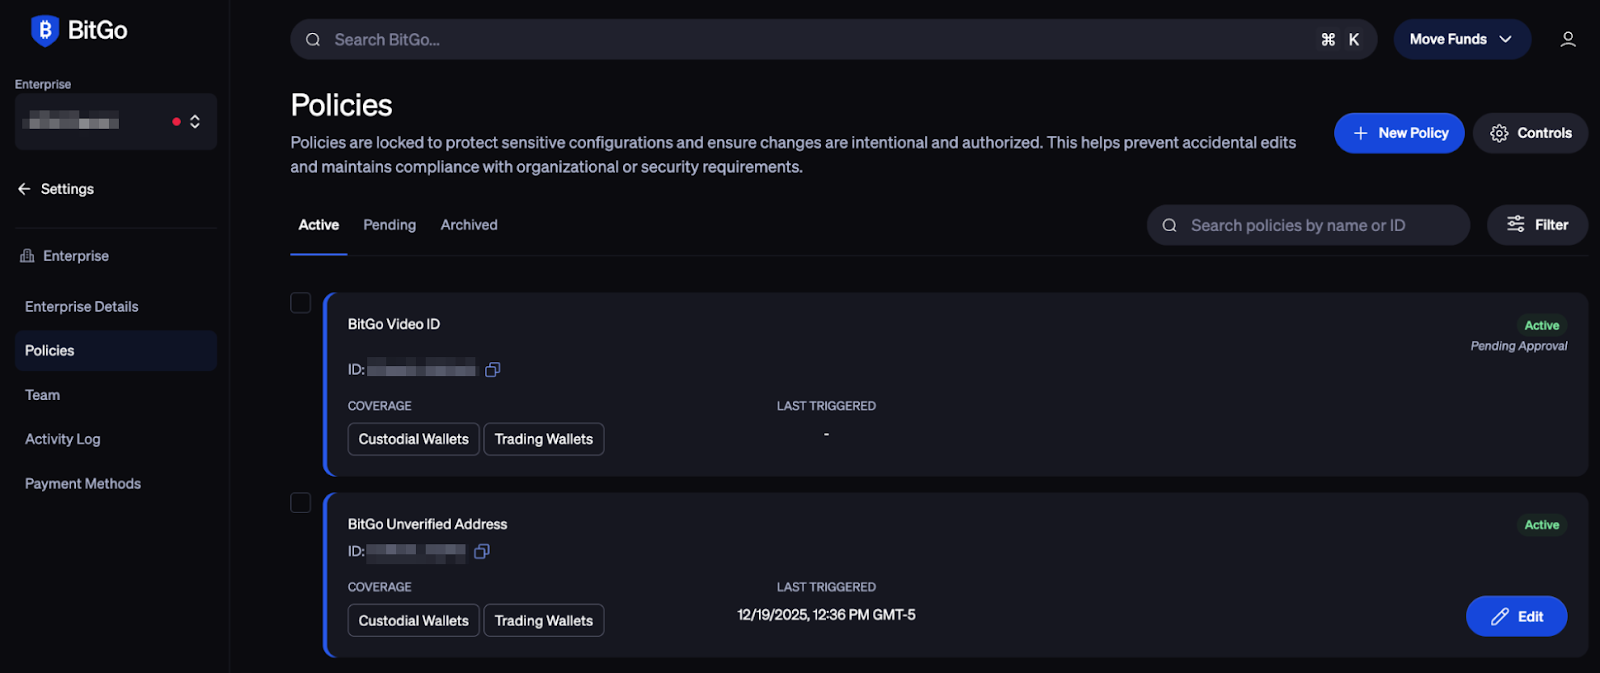
To add a Settlement policy, click + New Policy and specify the following fields:
Name: your policy name
Scope/part of your enterprise: Go Account
Trigger: select from withdrawal, settlement initiated or settlement approved
Condition: select the desired condition for the touchpoint
Action: select the desired action
Policies can be added on:
Withdrawals: you decide to send or transfer funds to another wallet
Settlement initiations: your enterprise initiates a settlement with a counterparty
Settlement approvals: your counterparty has initiated a settlement with you
Was this article helpful?
That’s Great!
Thank you for your feedback
Sorry! We couldn't be helpful
Thank you for your feedback
Feedback sent
We appreciate your effort and will try to fix the article