Managing Wallet Users
This article explains how to manage wallet users and roles, and how to create a self-custody hot wallet.
To manage and view wallet members for each wallet, go to Portfolio and select a wallet. Click the three-dot menu (⋯) on the right and and click Wallet Members. Under the Wallet Members tab of the Portfoliowallet page, you will be able to view members of that wallet. If you want to manage or add new members, follow the link to the Admin Console. Each wallet may have many users with various levels of access. A user of a wallet can be either an owner or user of the enterprise that that wallet is in.
Types of User Roles Within a Wallet
As mentioned in the Managing Users: Admin Console Admin default roles have been created to enable faster onboarding. Members who belong to default roles will be automatically added to all new wallets and enterprises in the organization with the respective permissions. The default roles have the following permissions across all wallets and enterprises.
Organization Admin: a member managing user permissions and access
Enterprise Admin: a member creating wallets within the enterprise, managing enterprise-level policies
Wallet Admin: a member managing wallet-level policies and whitelist
Wallet Spender: a member initiating transactions
Wallet Trader: a member initiating trades, can also view all wallets in the enterprise
Video ID User: a member undergoing Video ID verification with BitGo’s Trust team, allowing them to authorize sensitive operations that require identity confirmation
Viewer: a member view wallet balances and transactions
Auditor: a member viewing activity logs
For more information about roles and permissions, please refer to the Roles and Permissions Matrix.
If your enterprise has View all wallets turned on, any user added to the enterprise will have a viewer role for all wallets. Therefore, when adding a new user to a wallet, you will only see the Spender or Admin options.
Transactions that violate wallet policies must be approved by a wallet admin, but admins cannot approve their own transactions if there is more than one admin on the wallet.
Inviting Members to a Wallet
To invite members, use the Admin Console. Follow the steps outlined here.
Removing Users from a Wallet
To invite members, use the Admin Console. Follow the steps outlined here.
Self-Custody Hot Wallets
Creating a Self-Custody Hot Wallet
When creating a self-managed hot wallet, complete the following creation process:
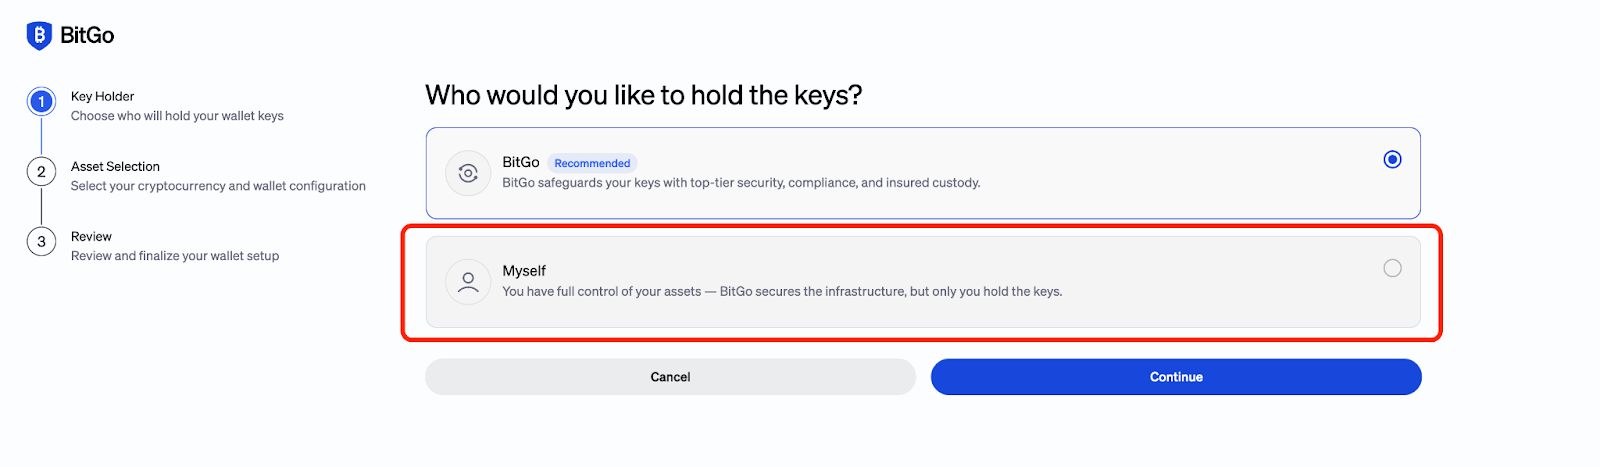
When prompted with the question Who would you like to hold the keys?, choose Myself
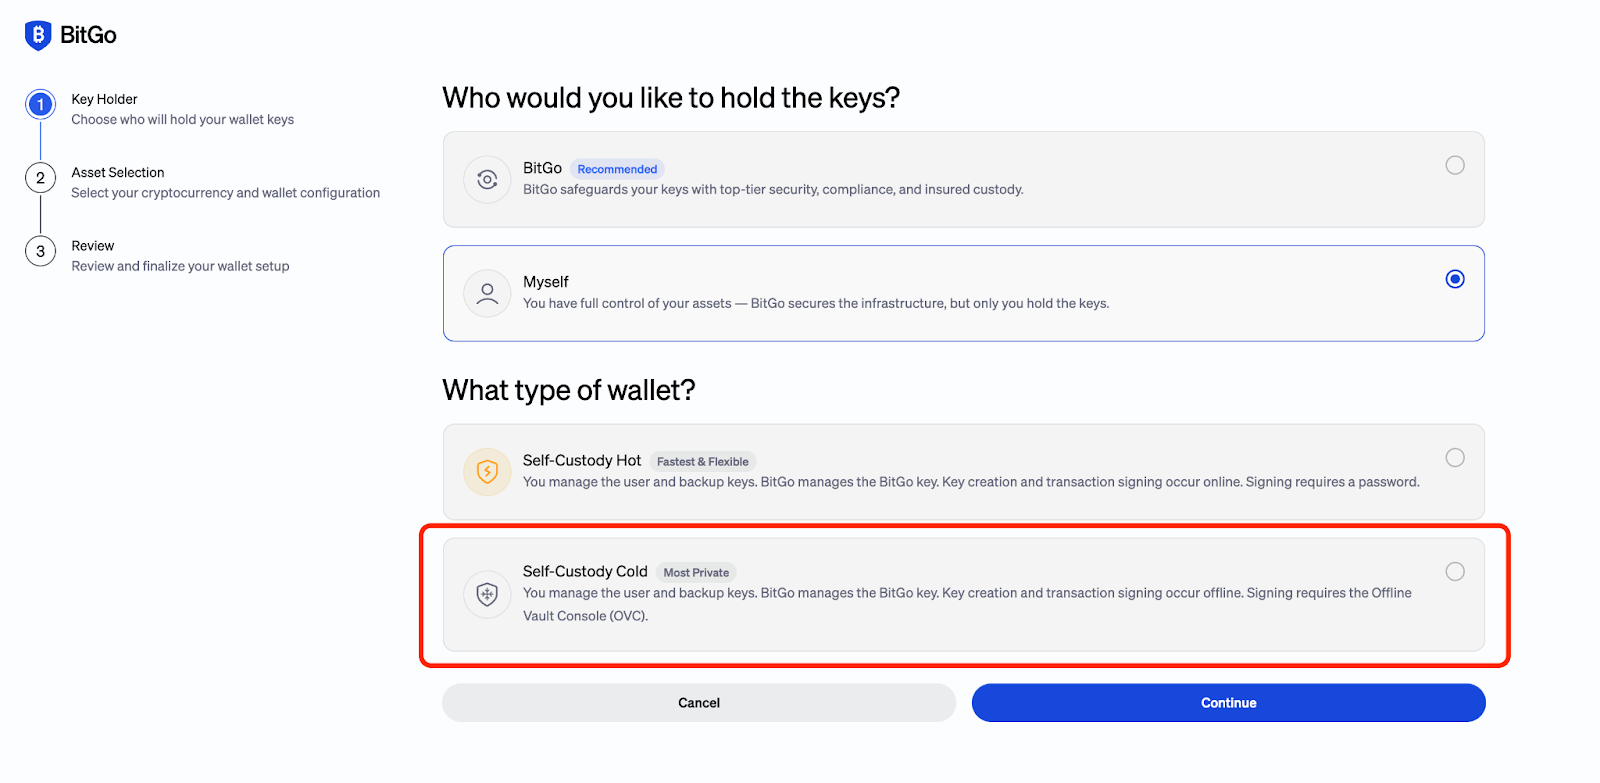
When prompted with the question What type of wallet?, choose the Self-Custody Hot selection and click Continue
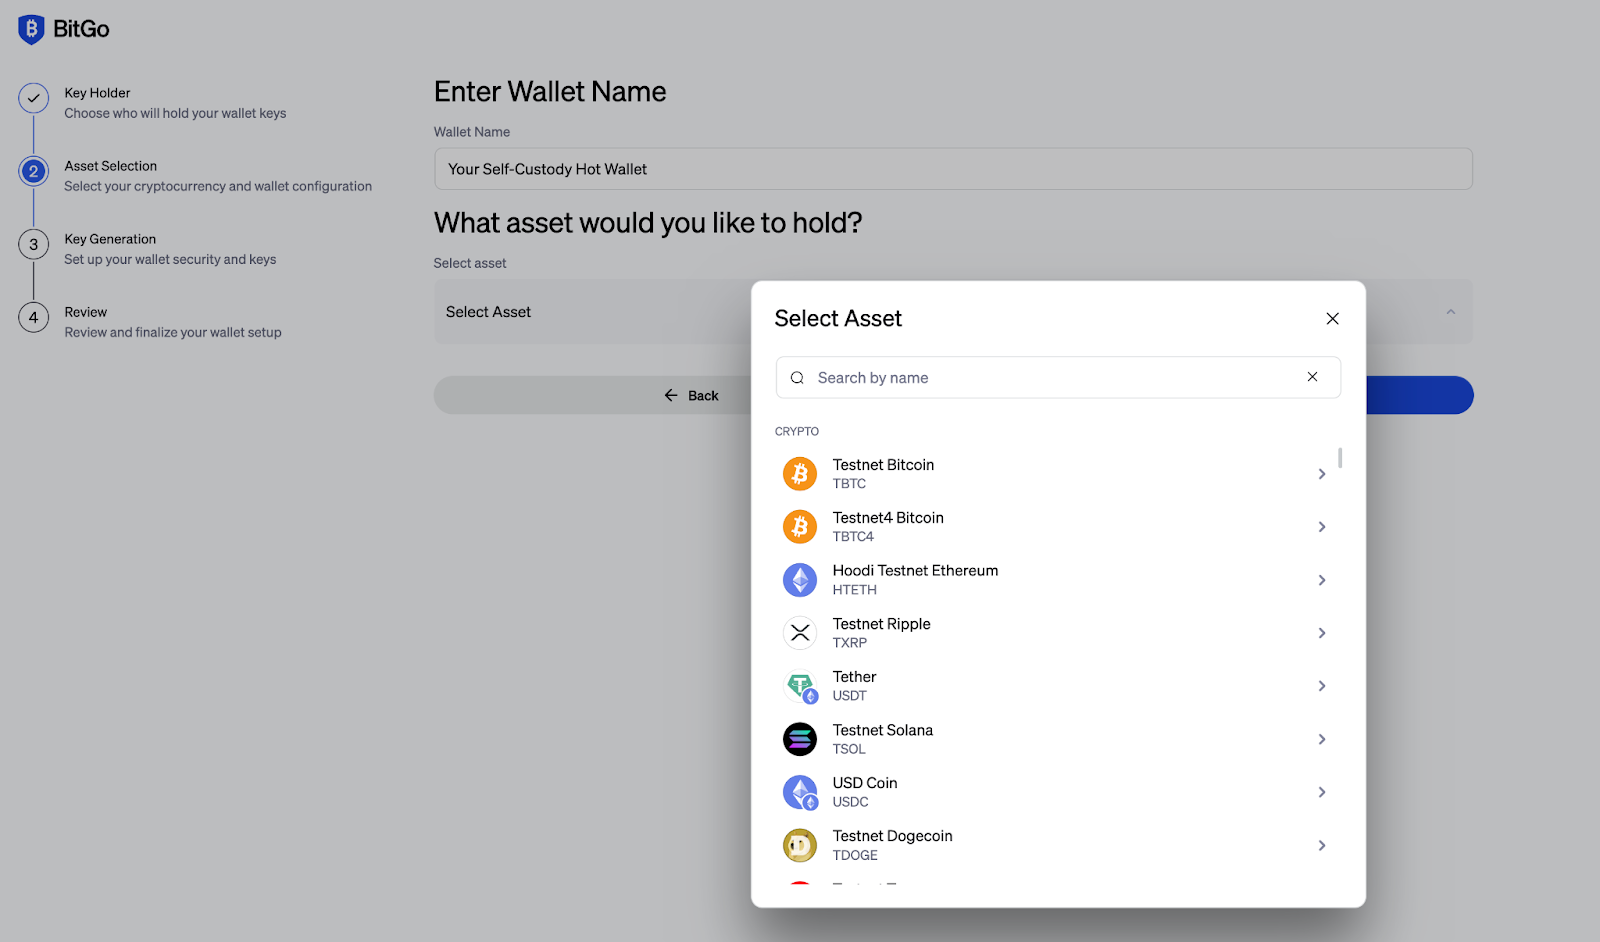
Choose a name for your wallet and use the drop down to choose which asset you want to hold
After choosing your asset, you will be prompted to select a way in which to sign transactions. Depending on the asset this will be either Multi-signature or Multi-Party Computation (MPC). For more information on multi-sig vs MPC, see our blog here
You will then need to enter your BitGo password in order to generate the keys. This is the same password you use to log in to the BitGo platform
Choosing a Password for Self-custody Hot Wallets
If you want to create a unique password for your self-custody hot wallet (a password that is different from your BitGo login), please reach out to your Customer Success Manager.
Creating a Backup Key for Self-custody Hot Wallets
After setting up a wallet password, you will be prompted to select how you want to create your backup key for the wallet:
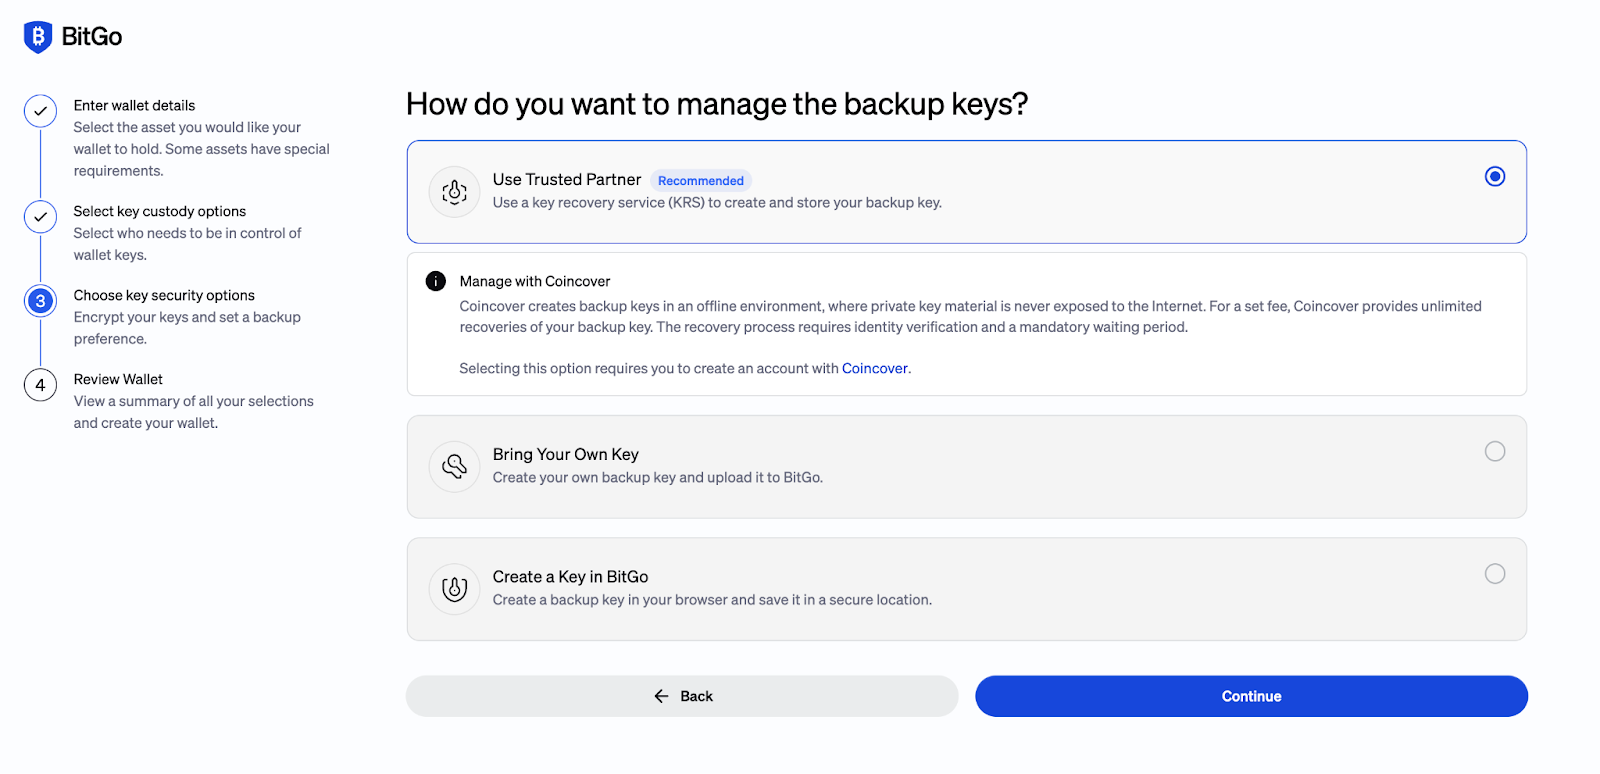
When making your selection, keep in mind the following about the three options:
Downloading the Keycard and Activating your Hot Wallet
Once you have chosen your backup key method, the wallet keycard will download automatically. Inside this keycard is an activation code; you will need to enter the 6-digit activation code to complete activating your wallet.
You should keep your keycard safe and secure. It is the only way to recover your wallet if you lose your wallet password.
Resetting your Hot Wallet Password
If your wallet has a unique password and it is lost or unusable for any reason, you will need the keycard for that wallet to recover it. To change your wallet password, select the desired wallet from the Wallets tab in the left navigation bar. Once you've selected your wallet, click the 3 dots icon at the top right, and click Settings.
From that screen, click Change Password. You will need your current password in order to change it to a new one.
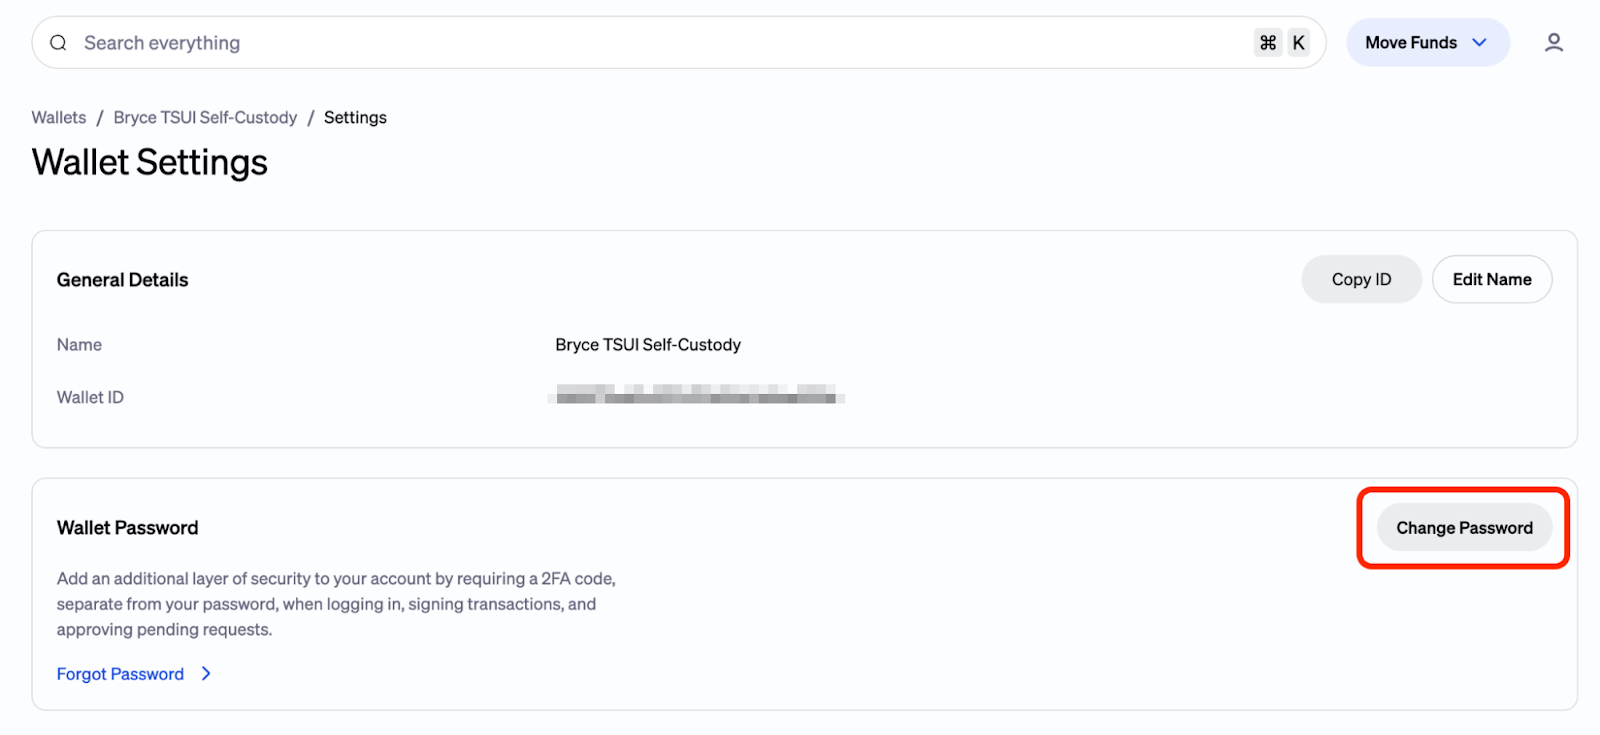
If you have forgotten your password, click the Forgot Password button. Enter your 2FA code and follow the on screen instructions to begin your password recovery.
Was this article helpful?
That’s Great!
Thank you for your feedback
Sorry! We couldn't be helpful
Thank you for your feedback
Feedback sent
We appreciate your effort and will try to fix the article