Configure User Management in the Admin Console
This article walks through how to invite members, assign roles, and manage user permissions in the BitGo Admin Console.
Once you have created your account, you will need to to configure your user permissions and settings in the BitGo Admin Console. For a detailed overview of the console's features, please refer to the Admin Console guide here.
- To access the Admin Console:
Click the Settings icon in the upper-right corner, then navigate to Team > Admin Console
Go to Security > Roles & Permissions in the left sidebar navigation
- Navigating the Admin Console
Once in the Admin Console, you'll find four main tabs to manage your organization: Members, Roles, Activity, and Controls.

Members: View all users in your organization, along with their assigned roles and permissions
Roles: See all available roles and inspect their details, including:
What permissions the role provides
Which enterprises and wallets are covered by this role
Which members are assigned to this role
Activity: Track all pending organizational changes that are awaiting approval
Controls: Set the required number of approvals and specify whether they must come from any Organization Admin or designated individuals
- Invite Members to Your Organization
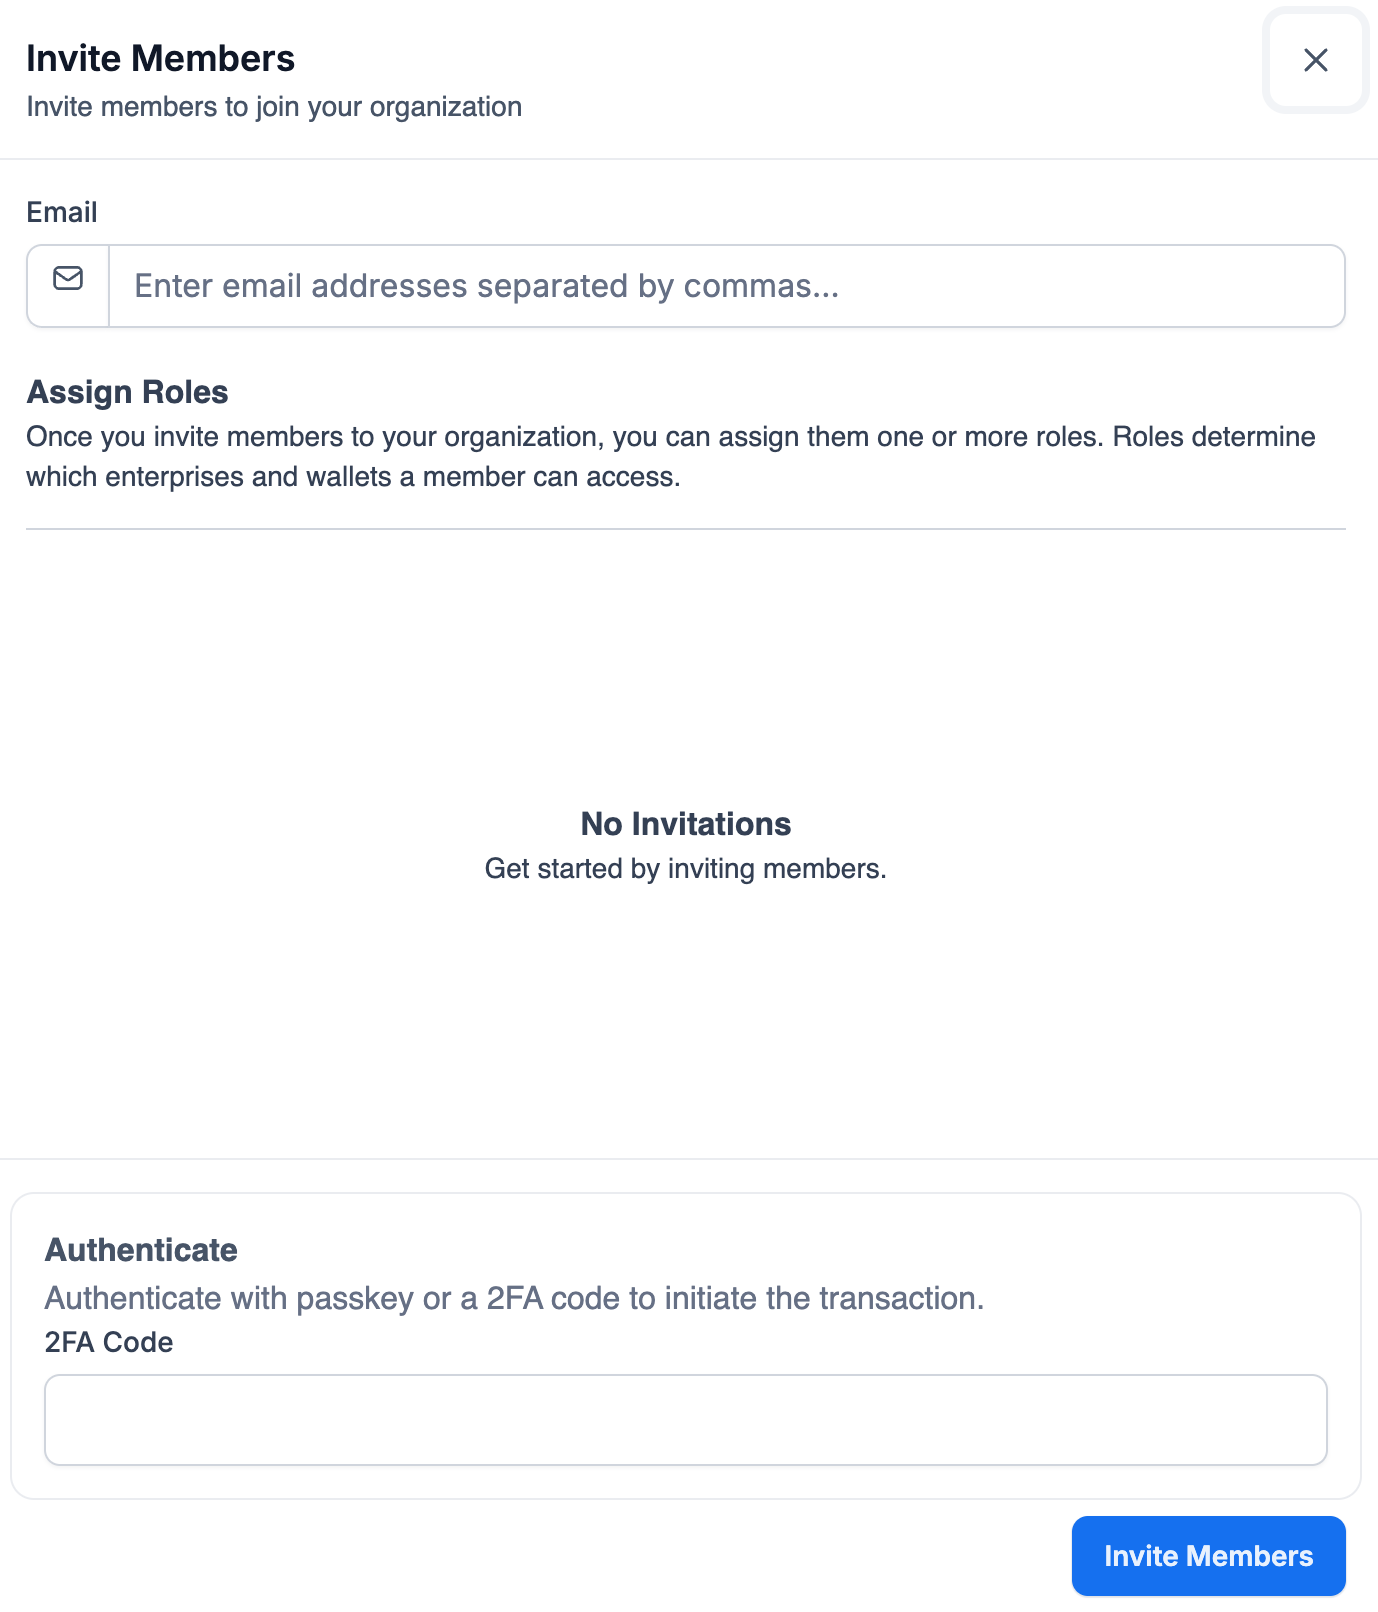
Navigate to the Members tab and click Invite Members. In the email address field, enter the emails of the users you wish to invite
Tip: You can invite multiple users at once by separating each email with a comma
Select one or many roles to grant to the user(s)
Enter your passkey or 2FA code to authorize the action. Then, click Invite Members to send the invitations
Removing a Member from Your Enterprise
⚠️ Risk of Permanent Fund Loss: Before removing a user, you must confirm they are not the sole key holder for any self-custody wallet. Removing the last key holder will permanently freeze access to that wallet and its funds. Ensure key ownership is transferred before proceeding.
On the Members tab, find the user you wish to remove
Click Edit Member next to their name
Select Remove Role and confirm the action
- Configure and Assign your Roles
From the Roles tab in the Admin Console, you can control what users are allowed to do. Roles are bundles of permissions that define a user's access to specific enterprises and wallets.
Default vs. Custom Roles
For more information, go to the Admin Console guide.
Default Roles: BitGo provides a set of pre-built roles, designed for quick and easy user management. These roles have fixed permissions that you can apply to all current and future wallets in your organization. They cannot be modified or deleted. Default roles consist of:
Organization Admin = Member managing user permissions and access
Organization Viewer = Member with read-only access to the Admin Console
Enterprise Admin = Member creating wallets within the enterprise and managing enterprise-level policies
Wallet Admin = Member managing wallet-level policies and whitelists
Wallet Spender = Member initiating transactions
Wallet Trader = Member initiating trades. Can also view all wallets in the enterprise
Video ID User: a member undergoing Video ID verification with BitGo’s Trust team, allowing them to authorize sensitive operations that require identity confirmation
Viewer = Member viewing wallet balances and transactions
Auditor = Member viewing activity logs
Custom Roles: For more granular control, you can create your own custom roles. These are fully configurable, allowing you to define the permissions and access levels that fit your organization's security needs.
- [Optional] Create a New Role
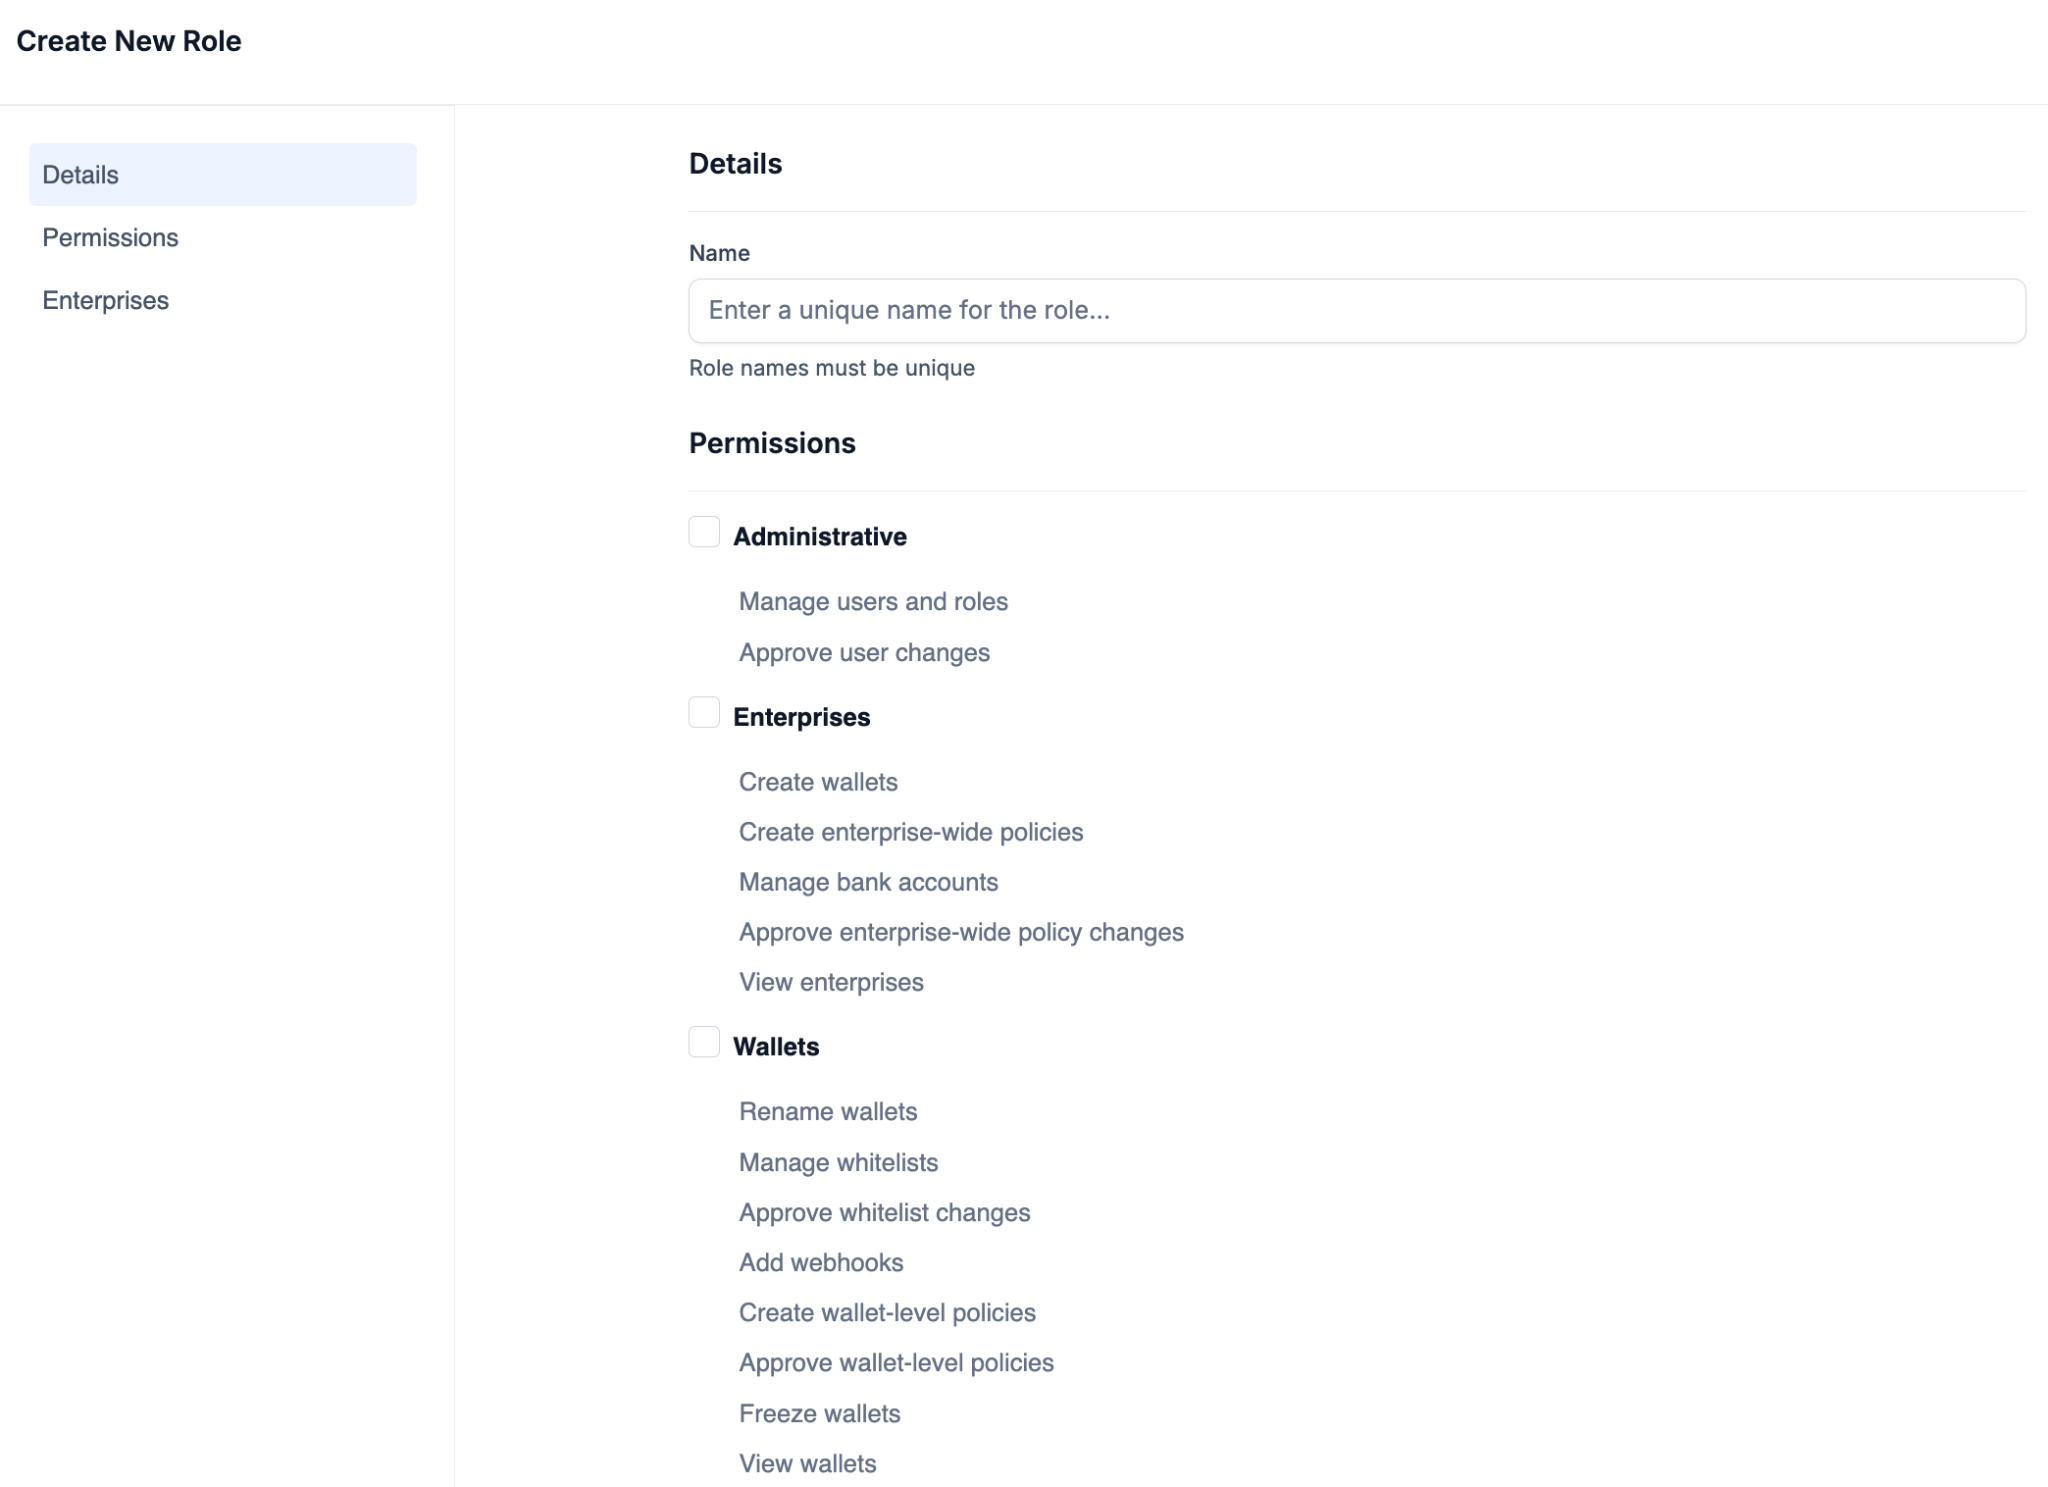
If you want users to have permissions or access to specific enterprises or wallets, rather than all, then you will want to create a custom role. To create a new role, select Create Role.
Give a Name for the role
Then, select the Permissions this role will include
You will also select which enterprises and wallets this user will have access to
Note: If you select All Enterprises, this role will have been granted access to all wallets within that enterprise
Once completed, click Create Role in the lower right hand corner
- Adding Members to Your Roles
Navigate to the Roles tab and select the Active view
Locate the role you wish to modify and click Members > + Add Members
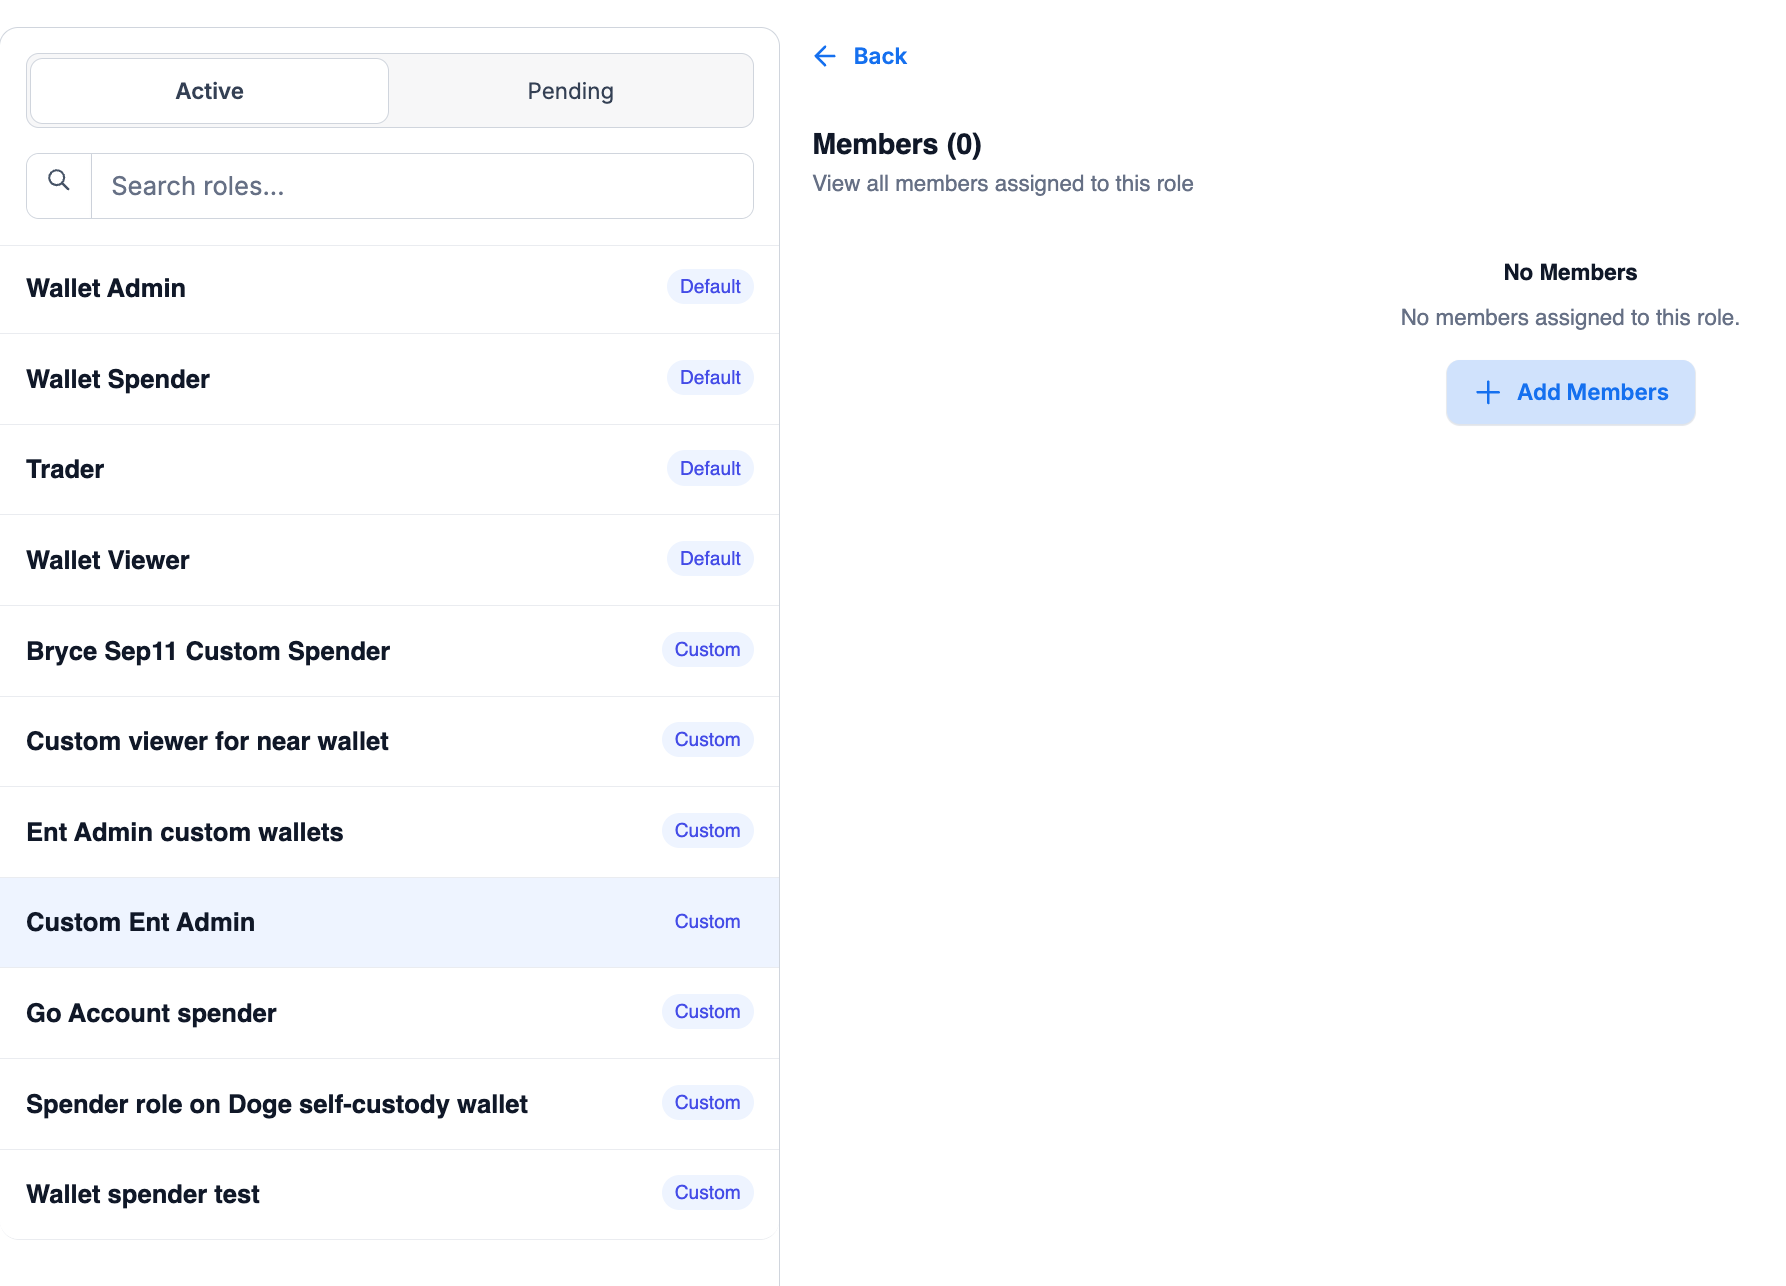
Select the members you want to add. You have two ways to do this:
Individually: Use the search bar to find users by name or email and select them
In Bulk: Click Add All Members to select every user in the enterprise
You have successfully added Members and created Roles to your Enterprise. Now, click the upper right Profile icon and select Back to Enterprise to go back to the main BitGo Dashboard
- Set Up Go Accounts and Self-Custody Hot Wallets
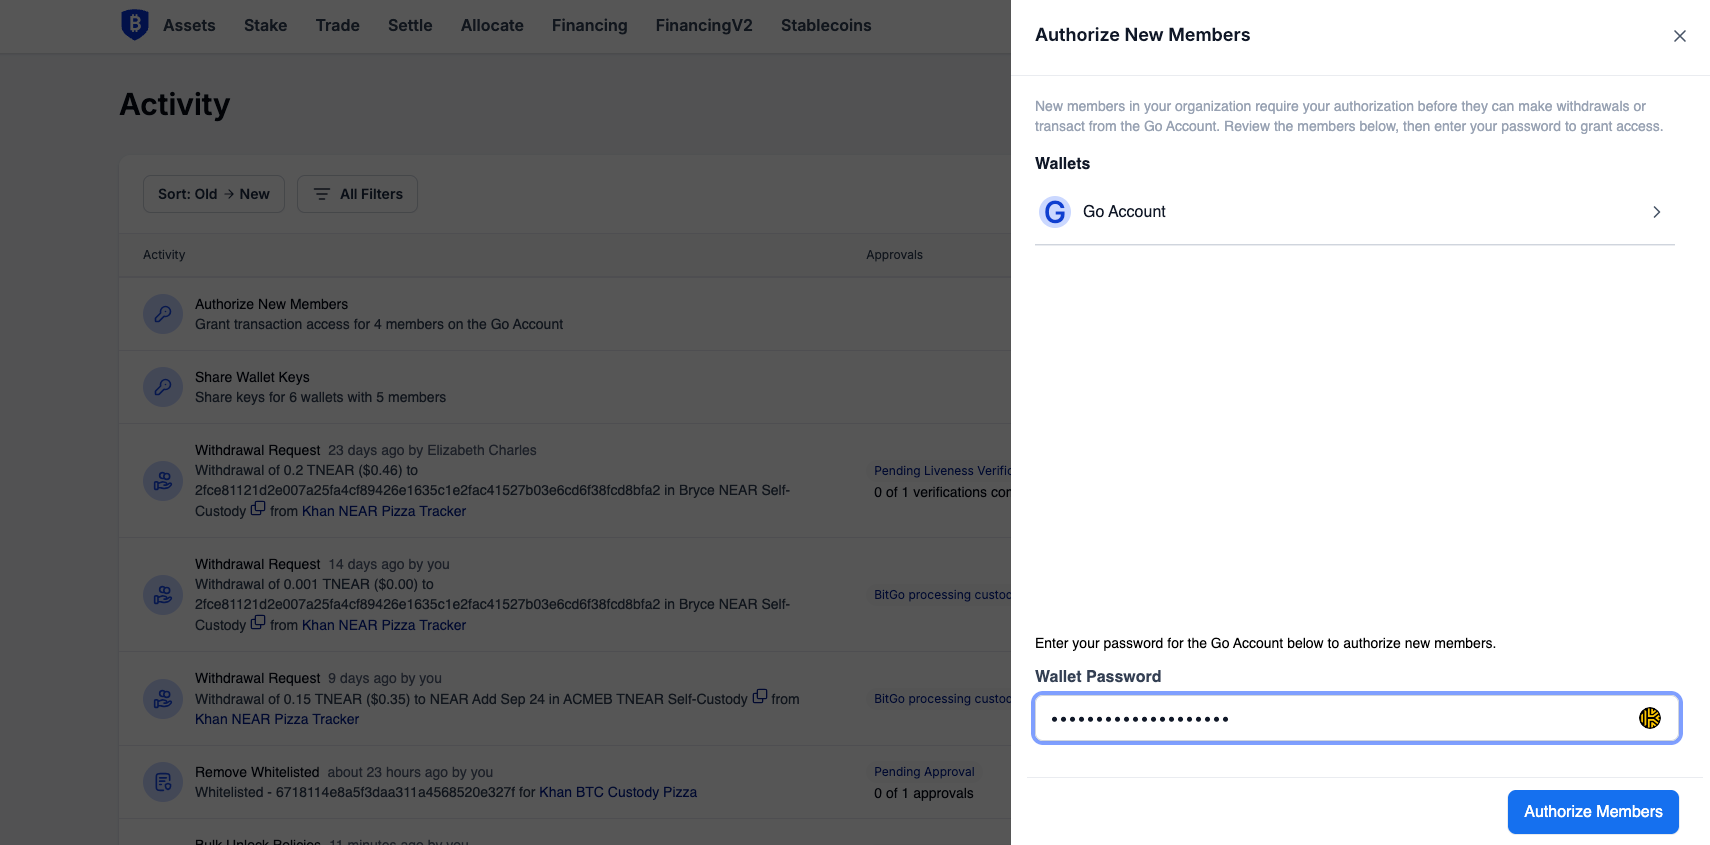
Go Accounts and Self-custody hot wallets are unique in that they require two extra steps when setting up your Admin Console.
After granting the user permission from the Admin Console, you (or any active Spender on these wallets), will need to Authorize New Members and/or Share Wallet Keys. This notice for action will pop up as an action item in the your Tasks page
Once these are authorized and/or shared, the receiver will also need to accept from their side
Was this article helpful?
That’s Great!
Thank you for your feedback
Sorry! We couldn't be helpful
Thank you for your feedback
Feedback sent
We appreciate your effort and will try to fix the article