Set Up and Create Your First Policy
This article walks through creating your first policy, covering scope, condition, and action step by step.
There are four individual components that make up a policy. Think of these as building blocks to enable you to create the exact policy you need to protect your assets.
Scope: The coverage of the policy
Example: All wallets in your enterprise
Touchpoint: The operation that triggers the policy
Example: Withdrawal
Condition: Required criteria that leads to specified actions
Example: Spending limit: e.g., withdrawals greater than $50k
Action: Something that must occur in order for the operation to proceed
Example: Wallet Admin Approvals
To learn more about BitGo’s policy engine, go Managing Policies > Policy Structure.
[Example] Create Your First Policy
For this example, let’s create a policy that will prevent a user from sending funds to a non-whitelisted address from any wallet in your enterprise.
Navigate to the Security > Policies page on the left side bar navigation and click on the + Create Policy button on the right hand side.

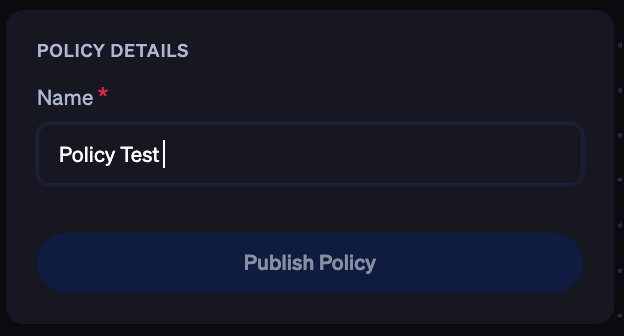
Name your policy
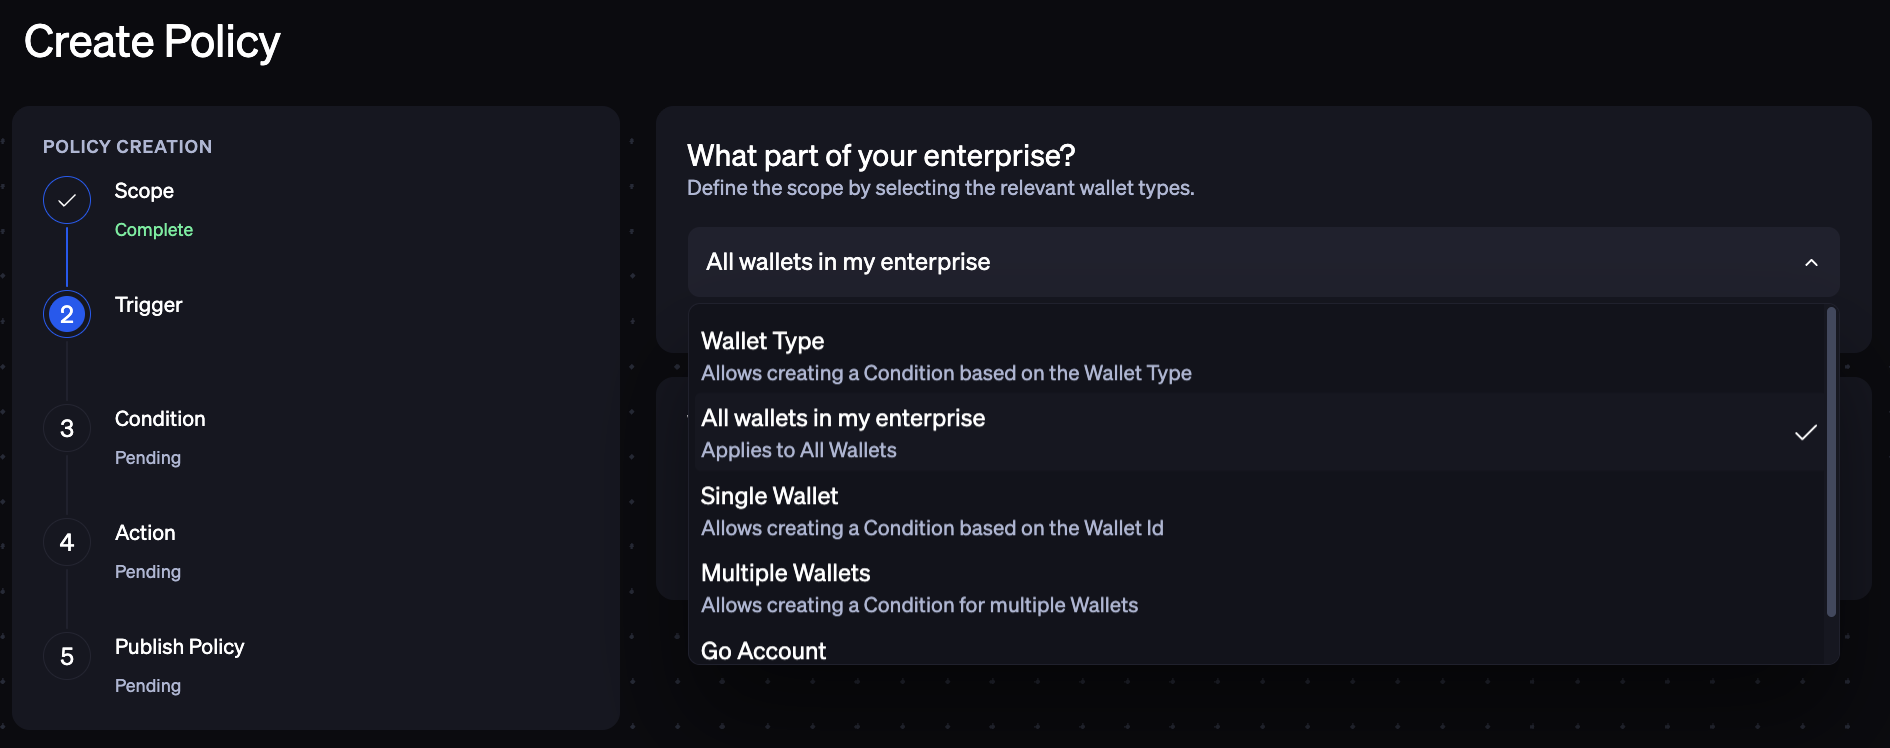
Navigate to the Scope field. Scope determines which wallets in your enterprise the policy applies to. For this example, we will select All Wallets in My Enterprise. Other available scope options include:
Wallet Type: Applies the policy to wallets of a specific type:
Hot
Self-managed Cold
Custody
Single Wallet: Applies the policy to one specific wallet. Note that at least one wallet must have been created to use this option.
Multiple Wallets: Applies the policy to more than one wallet. Note that at least two wallets must have been created to use this option.
Go Account
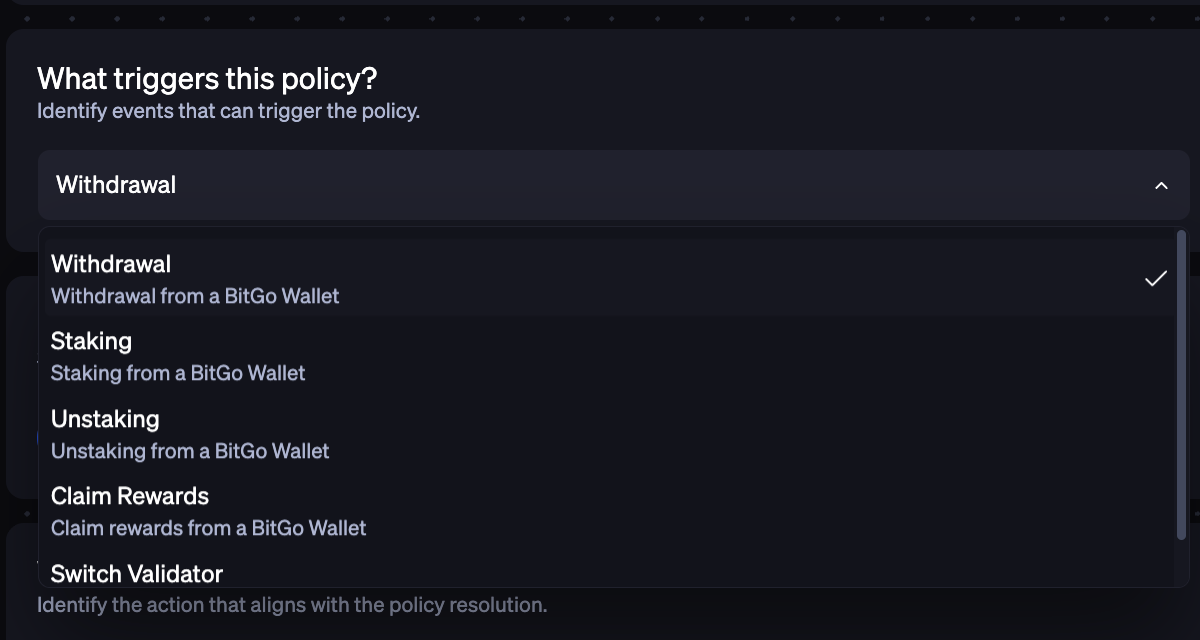
Next, in the Condition field, select that this policy will trigger on every attempted Withdrawal.
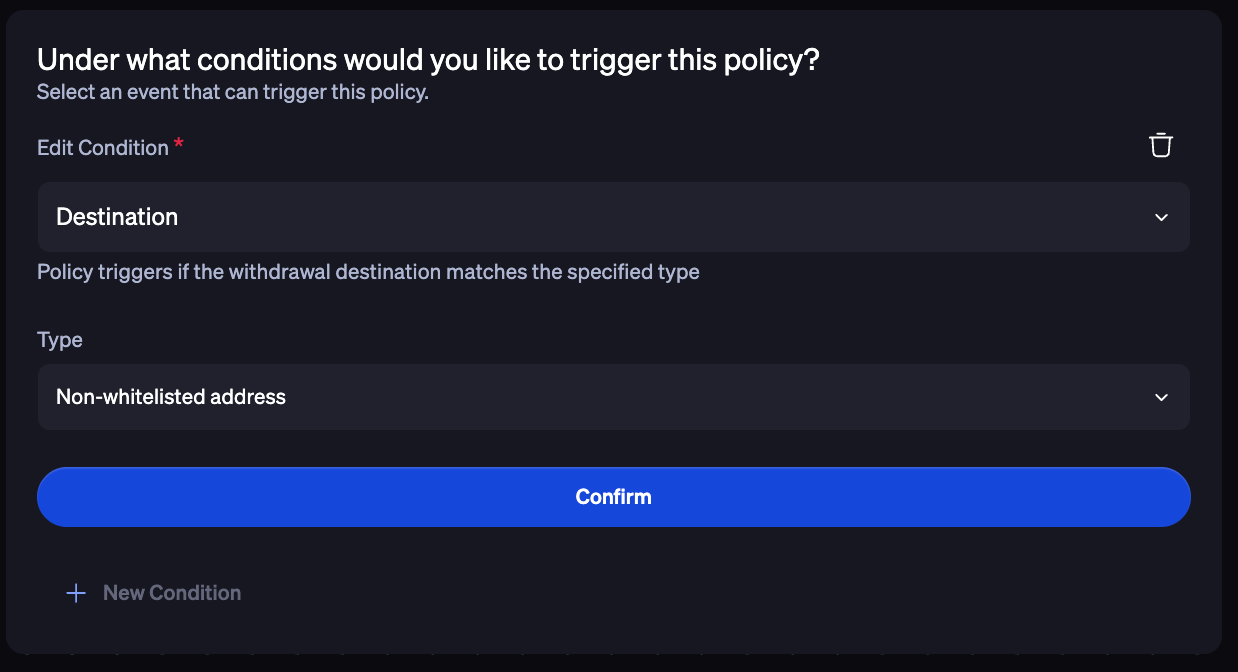
Click New Condition to define the criteria that will trigger the policy. For this example, we are creating a rule that prevents a specific user from sending funds to any non-whitelisted address. Since we want to restrict which addresses can receive transfers from this wallet, select Destination as the condition. Then, under Type, select Non-Whitelisted Address and click Confirm.
5b. You can add as many conditions to a policy as needed. For this example, we are adding a second condition that blocks a specific user from initiating transfers from this wallet.
Click + New Condition and select Initiated By as the condition type. In the User IDs field, enter the relevant user's name (e.g., Arnold) and click Confirm.
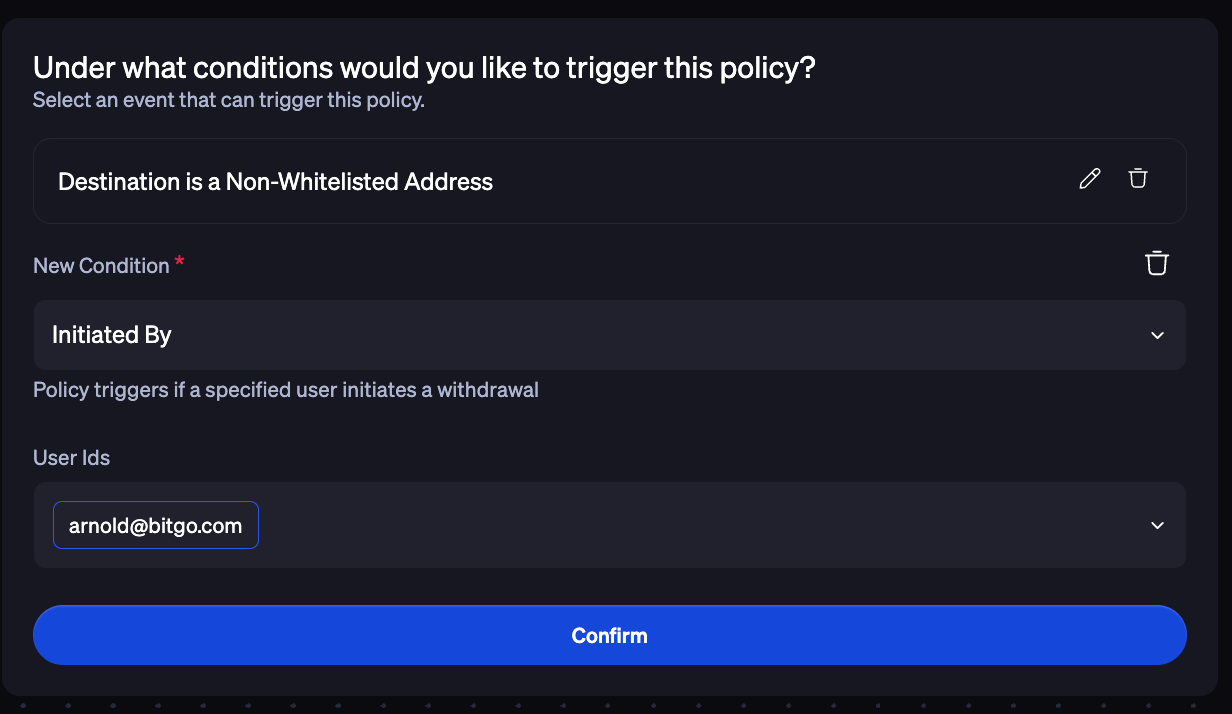
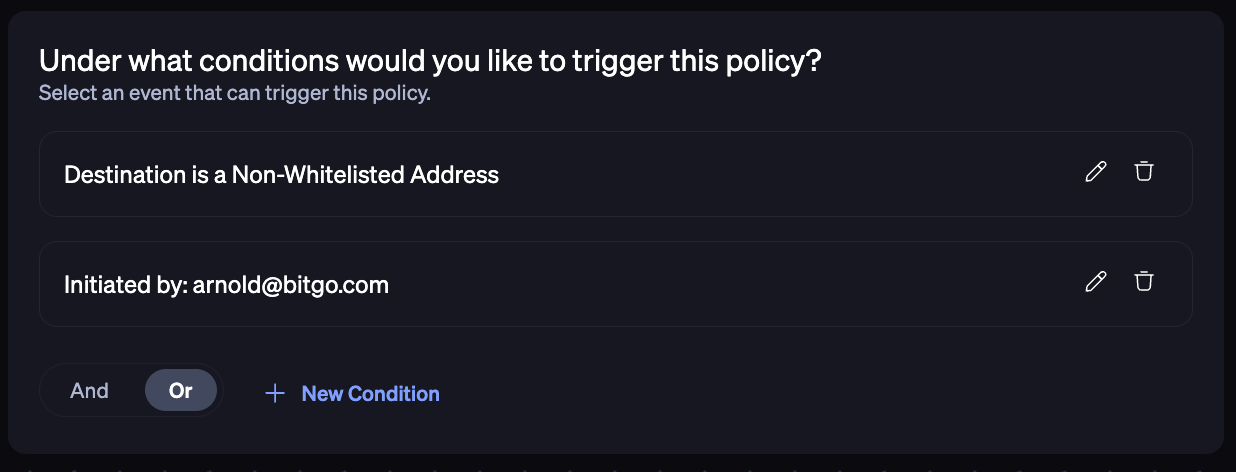
5c. Clicking Confirm will create the condition and open the And/Or option. Here, we will select Or because we want the condition to be applied if either the first or this condition is met.
Selecting And means all conditions must be met
Selecting Or means at least 1 condition must be met
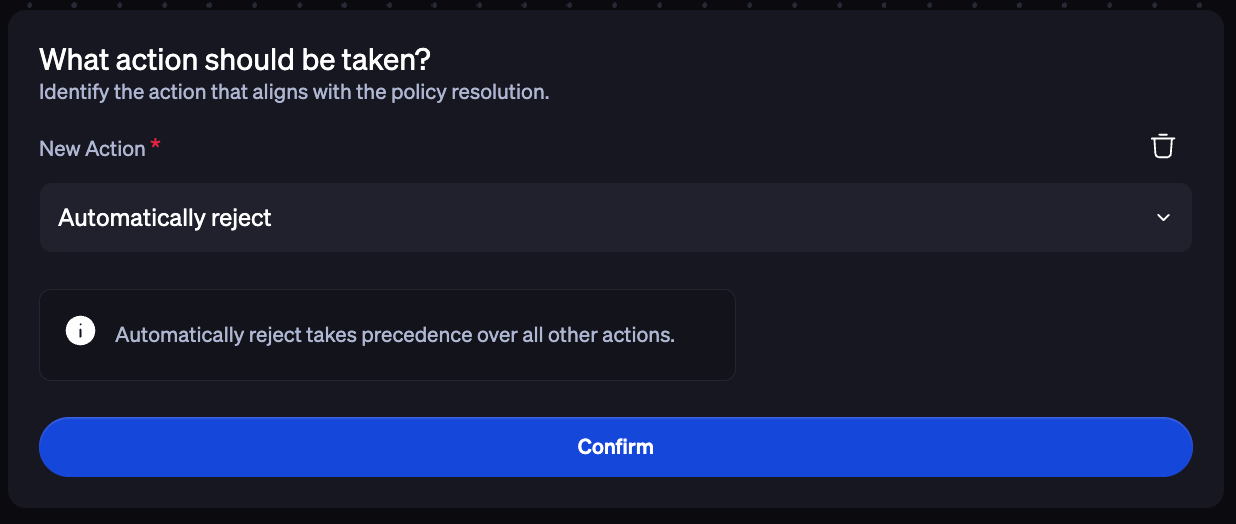
Next, we want to determine what action will occur if the conditions are met. Click New Action. Select Automatically Reject under the Action Type from the drop down menu and click Confirm.
Once all conditions have been set and reviewed, click Publish Policy.
You have successfully created your first policy!
Was this article helpful?
That’s Great!
Thank you for your feedback
Sorry! We couldn't be helpful
Thank you for your feedback
Feedback sent
We appreciate your effort and will try to fix the article